Marmorino Velvet
Overview
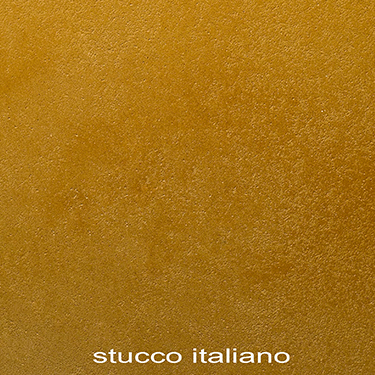
This is one of the most elegant lime-based wall finishes rendering the widest variety of aesthetic possibilities. Its slightly rough, opaque, flat finish is velvety to the touch with the typical chiaroscuro appearance of fine suede or chamois.
This velvety look is achieved because of the high quantity of cellulose micro-fibers it contains. This makes it very durable and elastic, and therefore, more resistant to cracking if the underlying plaster cracks.
Details
It mimicks this soft leather’s ability to glow with soft light and shade. The feel of chamois is also evident to the touch, thanks to a large quantity of micro-fibres present in the material. The product is white and can be tinted with our Color System
APPLICATION - INSTRUCTION
Tools necessary for application: A normal big trowel, a good big trowel, a plastic trowel, a sponge float
Before application
Protection of the work area: Place masking tape and protective material over the baseboards and around windows and doors.
Primer application
One coat of Primer Quartz should be applied with roller or brush to a uniformly smooth, clean surface and allowed to dry completely (3-5 hours).
It is necessary to apply the primer on all surfaces with the exception of plasters made of lime and sand. These have a similar composition to marmorino.
Preparation of the Marmorino material – coloring
After opening the container of Velvet Marmorino, remove any water on the surface, and mix for about 30 seconds using an electric mixer until homogenized. Add the coloring pigment and mix until the color is completely uniform. To correctly choose and mix the color read “General Rules for Correct Color Mixing” described in our Color System.
Remember that lime loses its viscosity once shaken. If the material, after mixing, is too loose wait it rests 6 to 8 hours before using.
Application
Remember to have a strong light parallel to the wall and situated on only one of the two sides of the wall you are working on (usually on the same side other sources of light come from such as the windows). In this way the shadow of the trowel allows you to see the actual state of the finish. Every so often, during the second and third coats, the light should be moved so that the wall doesn’t dry out too much in one spot from the heat of the lamp.
Don’t apply in temperatures below 5°C / 41°F.
During application be sure the work area isn’t too damp or warm to avoid problems with application times.
- Apply a thin, even coat of 'Marmorino Velvet' over the entire surface with a metal trowel. Avoid making too many ridges and allow it to dry completely (6-8 hours). The first coat can be white even if you plan to have a colored finish. If the final color is to be dark it is best to remove the masking tape from around doors, windows and baseboards and reapply the tape; otherwise, a strip of white may be visible when the tape is finally removed. Therefore, remove the tape and replace it approximately 1/16” distant from the original position of the tape.
- Second coat: if you apply the second coat as evenly as possible with a metal trowel you will get little or no dark and light effect, but if you apply it “badly”, that is, with areas with more material close to areas with less material, you will get more of the chiaroscuro effect, especially with dark colors.
Alternatively to increase the chamois effect, you can dampen the walls lightly and evenly just before applying the second coat. Some areas will remain damper than others, which will result in a surface with both smooth and rough areas after the final smoothing phase.
To apply this coat make sure the blade-edge of the trowel is always clean and free of imperfections. The edge can be cleaned with P360 sandpaper. Usually the second coat is applied over the entire surface before applying the third coat. But on large surfaces in hot, dry conditions it might be necessary to have a second person begin to apply the third coat while the first person completes the second coat. - The third coat should be applied before the second coat has dried completely. To recognize when this is, you should observe that the water that was on the surface has been absorbed, but the plaster still appears slightly damp. The second coat should have almost completed the shrinking process that typically occurs with lime-based products. With ideal room temperatures, this occurs after about 15 minutes, the time it usually takes to apply the second coat to a medium-sized wall.
- The third coat will be applied over this even surface. No special care need be taken when applying it since this final layer will be smoothed out almost immediately with a dry sponge float. It is difficult to say how much time you need to wait before using the sponge float because it depends on how absorbent the wall is and what the temperature is. You’ll know if it is too soon because you will see small ridges forming as you use the sponge float. Generally the plaster should be damp enough to be able to smooth the surface moving the sponge float in opposite sweeping directions several times. This will fill in pits and flatten ridges without leaving marks on the wall.
- The sponge float will need to be cleaned from time to time of excess marmorino which will accumulate on its surface. To do this, gently scrape the surface of the sponge float on the edge of a metal trowel, and then scrape the excess marmorino into a container to be reused later.
- Before it dries completely, go over the wall with a plastic trowel which has smooth, rounded edges. As when using the sponge float, you will know when to perform this phase of the smoothing process by observation. It is too early to use the plastic trowel if you leave small ridges in the plaster and too late when you are unable to smooth out the roughness left from using the sponge float.
- The plastic trowel should be pressed almost flat on the wall (with a 25-30° angle) moving it in opposite sweeping directions to avoid making ridges. It is advisable to use a strong light source parallel to the walls when smoothing out the surface to detect imperfections you may create while moving the trowel over the surface. The wall will be finished when it appears almost shiny when viewed against the light. You will observe - especially with darker colors – that the smoothest parts appear the darkest.
- Remove all tape and protective material before the plaster is completely dried to avoid chipping and cracking along the taped edge. In fact, the tape can be removed right before the last phase where you use the plastic trowel.
Application variations
This versatile material can achieve a number of special effects:
Marmorino Velvet with wax
Once it is completely dry, it can be given a distinctive color using our water-based bees' wax (Natural Wax). If a naturally tinted bees' wax is used on a dark-coloured Velvet Marmorino, the small pits and scratches on the surface will take on a white color since the wax is naturally light-colored. Otherwise, the wax can be tinted almost any color allowing you to obtain a variety of effects from an antique patina to an artistic look with a strong visual impact.
Note that with our wax and colorants, you can always change the color even with the passing of time. To make the wax lighter, all you have to do is add our “White Powdered Dye”; to make it darker, tint it with the color of your choice. It is always advisable to try out the color on a sample board or on part of the wall which is not so visible.
Our metallic glitter or pearlescent waxes can also be used to get veiled effects.
Damasque effect
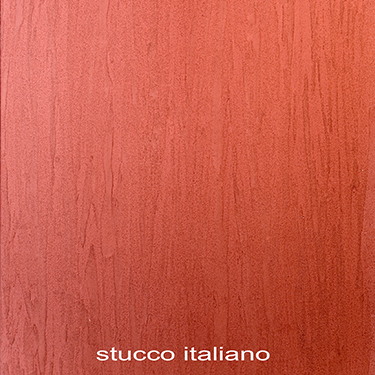
A Damasque effect can be obtained by applying a very thick second coat of Velvet Marmorino and passing over it immediately with a completely flat, metal trowel always moving in the same direction (horizontally or vertically). Ridges will be formed in this way which should then be pressed down lightly with a plastic or metal trowel before drying.
Other effects
You can use a metal trowel instead of a plastic one in the final phase of the smoothing process to leave dark marks on the finished surface. These are transferred from the metal trowel to the smoothest areas. This effect is used mostly on dark finishes.
To make the finish feel more velvety to the touch, you can sand the surface lightly (after 48 hours) with P 220-360 sandpaper (this brings up the cellulose fibers) and then brush off the dust.
Maintenance of stucco Marmorino Velvet
For interiors: Apply our natural wax as the simplest form of protection without changing the look of your finish. For dark colors be careful to tint it in the same colour of the stucco since our bee's wax is slightly white. Apply it like it is on dark colors for special effects.
For interiors: Apply our acrylic wax for Floors which guarantees waterproofing and protection against all types of dirt. There are three kinds available: Flat, Semi-gloss and Glossy, which increases shine on Velvet Marmorino. Apply it, diluted with water by 70-100%, preferably with a spray bottle or a brush.
To water-proof it, you can apply our lime-based, plaster waterproofing. When applying a water-based product on a dark finish be careful not to soak it too much to keep salt from coming up from the bottom which could stain the color
For exteriors: If the finish needs protection, we suggest our waterproofing for lime-based materials.
To clean natural finishes with no protection: The most practical way to clean this type of finish is with a white rubber eraser or sand paper (P 220-320). It’s very easy to clean most dirty areas by simply using sand paper and dusting off the powder residue.
Media
-

Metallic Velvet Marmorino
6827 Views
-

Damascus Effect Gray
6476 Views
-

Damascus Effect Red
6355 Views


